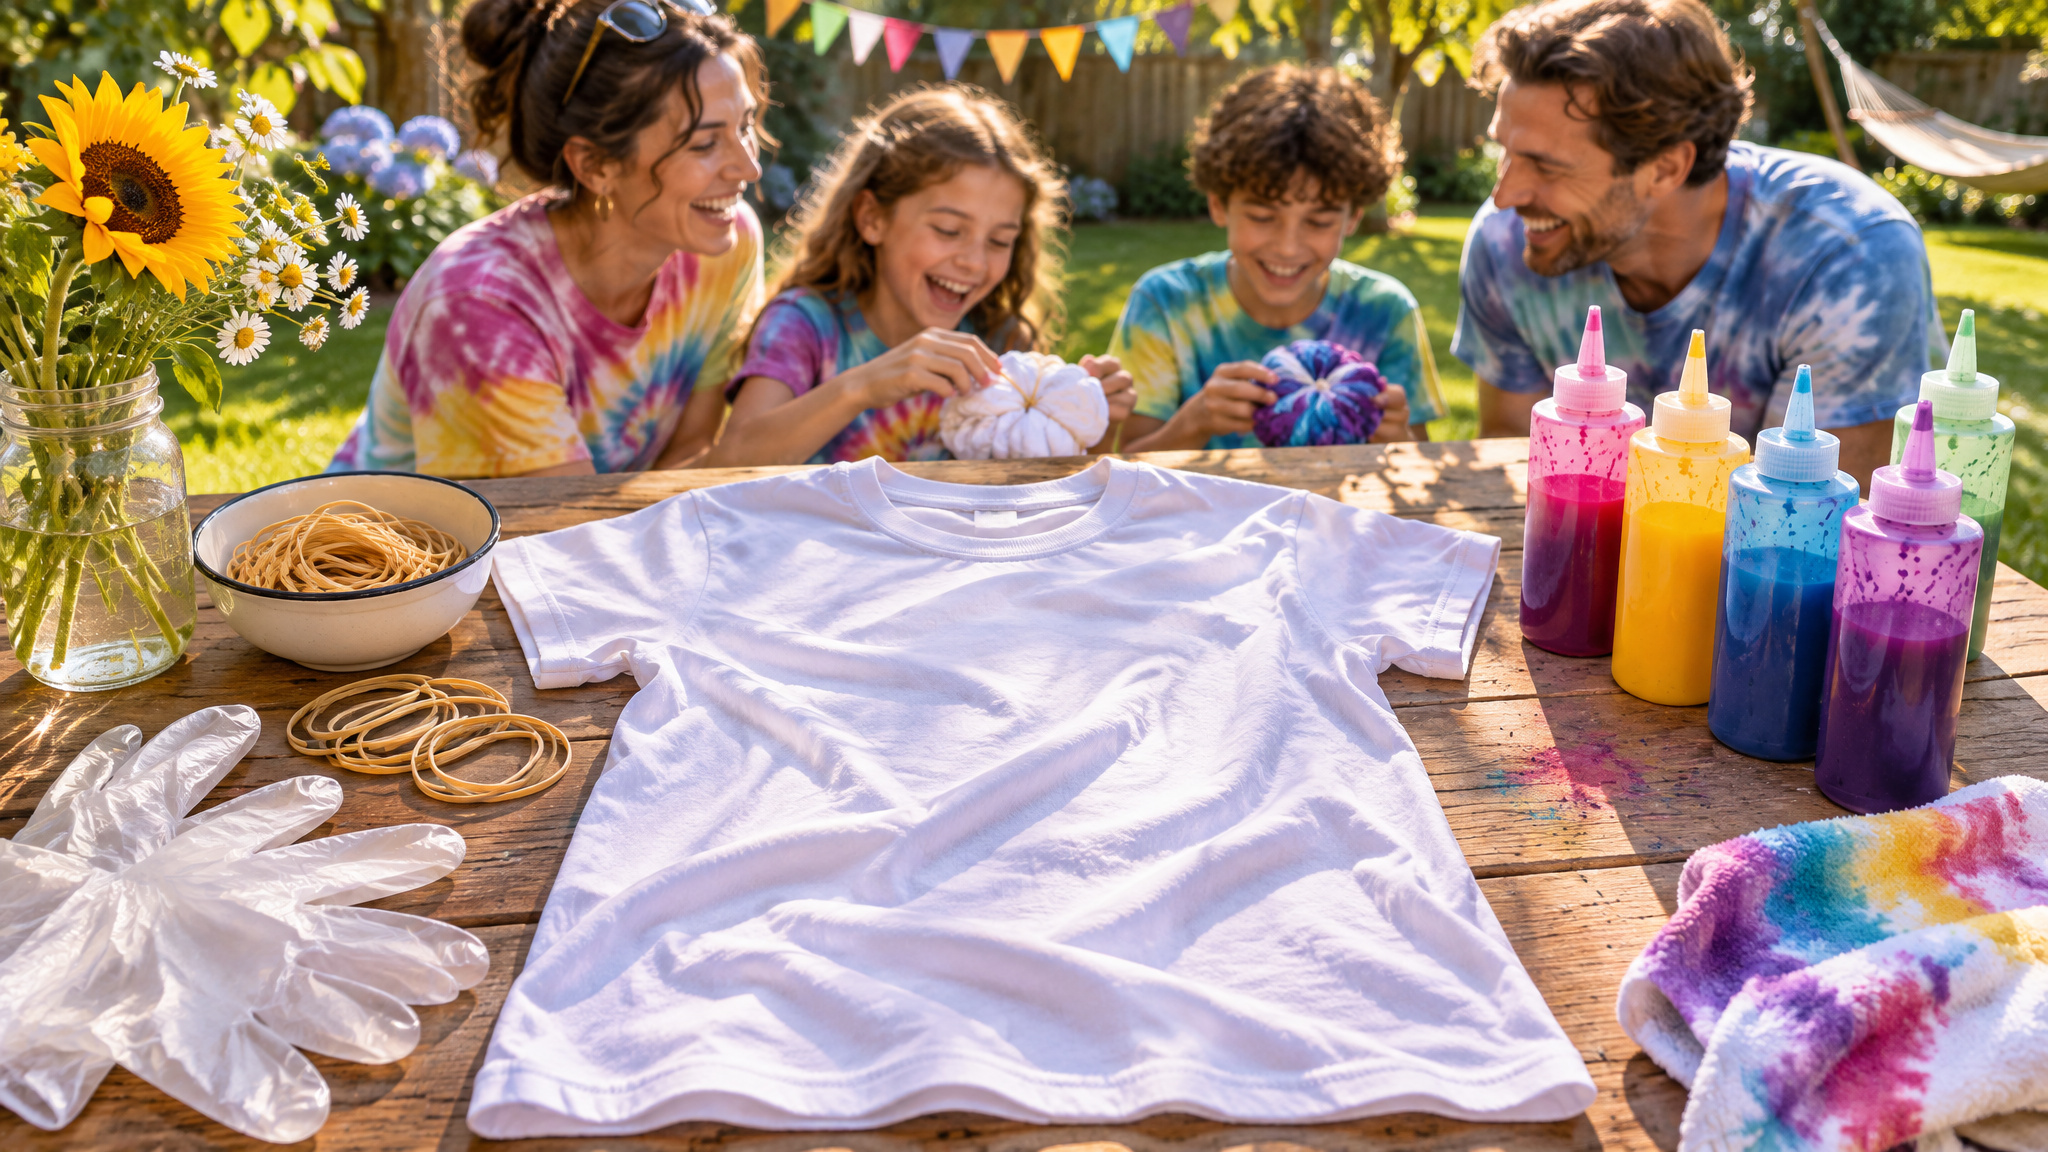
My daughter wanted a tie-dye bikini, which sounded like a fun Saturday afternoon project until we sat down to plan it. Suddenly we weren’t just squirting color onto a white T-shirt. We had to figure out whether swimwear fabric would even hold dye, how to scale a pattern down to a tiny garment, which dye kit wouldn’t take three days, and how to wash the finished piece without ruining the next load of laundry.
Tie-dyeing with kids goes a lot smoother when you treat it like a real kitchen project instead of a free-for-all. From picking the right fabric and setting up a mess-proof table to splitting the work and surviving the first wash without turning a towel pink, here’s how one full family session works from start to finish.
Key Takeaways
Tulip One-Step ($20 on Amazon, $37 at Walmart) covers about 9 shirts from 3 bottles and sets in 6 to 8 hours for a one-day project, while Jacquard makes 15 shirts with zero first-wash bleeding if you have 24+ hours.
Limiting beginners to 3 or 4 colors, applying lighter shades first, and shaking dye bottles for 10 to 15 seconds prevents muddy results, dots, and streaks.
On whether to rinse freshly dyed shirts in cold water, 4 of 4 sources checked for this guide that answer yes or no say yes, whereas 1 of 3 posters who reported their own experience says cold water first, then hotter (with 1 using hot water and 1 skipping the rinse).
Table of contents
Table of Contents
Pick and prep the shirt
Cheap, plain 100% cotton shirts give you the brightest, boldest results, whether they’re brand new or pulled from the back of a drawer. White makes colors pop the most, though light and pastel fabrics work fine too. Before you buy anything, check your kit’s label for fabric compatibility: some dyes handle cotton blends and synthetics, while others don’t. Rit’s microwave method, for example, only works on fabric with less than 35% synthetic fiber.
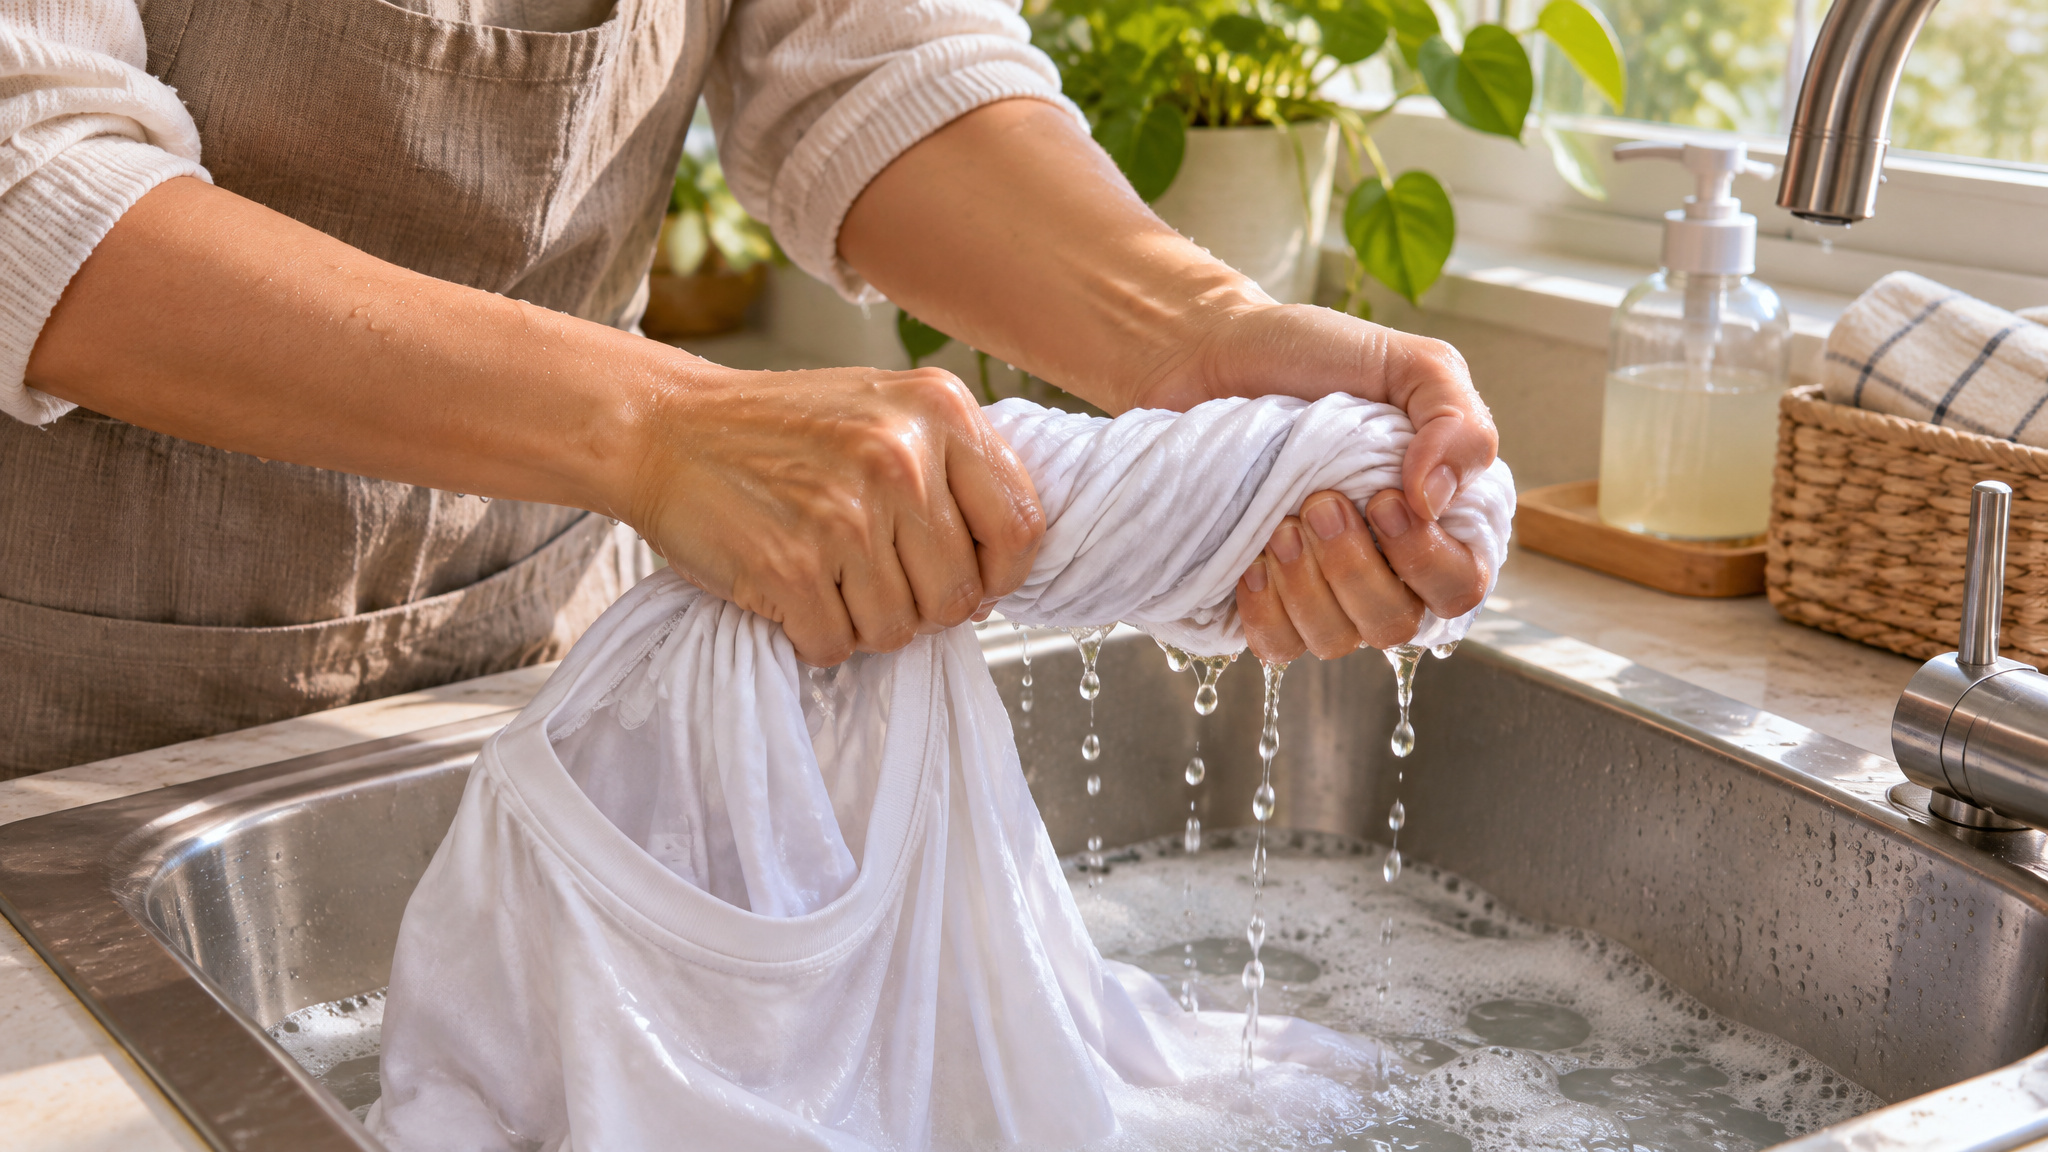
Prewashing and dampening your shirts removes the manufacturer’s water-repellent coating, stops them from shrinking after you dye them, and makes the fabric easier to fold. In testing updated May 21, 2024, Taryn Mohrman, writing at nytimes.com, found that Tulip One-Step dye absorbed nearly the same on dry shirts as on prewashed ones, though the color didn’t spread quite as far on dry fabric.
Lay out everything you need before mixing a drop of dye so nobody is hunting through cabinets with stained hands:
- Prewashed, damp shirts or fabric items
- A plastic tablecloth or garbage bags
- Rubber bands
- Disposable gloves
- Plastic wrap or gallon zip-top bags
- Paper towels
- An optional plastic bin for setting or rinsing
Blank shirt picks
If you’re buying fresh blanks for a group, these three options came from product testing and retail listings rather than our own laundry room:
- Bella + Canvas 3001 Unisex Jersey Tee ($7 to $9): Comes in a good size range, though it shrinks in the wash so size up.
- Hanes Boys’ Crew T-Shirts 5 Pack ($11): Runs from XS (2/4) to XL (18/20), making it a cost-effective pick when you’re dyeing multiples.
- Hanes Perfect-T Women’s Short Sleeve Cotton T-Shirt (under $10): Soft with a wide size range and a longer cut, though it shrinks more than average.
Set up the workspace and split the jobs
Mess control for a family tie-dye session is a setup problem: cover every surface, dye outdoors when possible, and divide the work before you open a bottle. Spread cardboard, garbage bags, plastic sheeting, or a disposable tablecloth across your table, and set up in the yard or garage whenever the weather cooperates.
Put everyone in right-size disposable gloves (a 5-inch palm gives enough dexterity to twist bands and aim bottles), tie back long hair, and wear aprons or old clothes you don’t care about. Keep paper towels within arm’s reach, set out an optional plastic bin for holding or rinsing dyed pieces, and never rest wet dyed fabric on anything else. Skipping surface protection has a real cost: in Mohrman’s testing, an uncovered table was permanently stained blue.
In our house, we split tie-dye setup, tying, dyeing, and cleanup across the whole family in three steps: first, set up outdoors or in the garage and cover your work surface with cardboard, garbage bags, or plastic sheeting; next, have someone cap the dye bottles firmly and shake them for 10 to 15 seconds so the powdered dye dissolves; and finally, have everyone pitch in to rinse dyed pieces in a plastic bin and clear away the covers. Nobody wants to be the only person scrubbing dye off the patio while everyone else admires their shirts.
Rajni Kavula, who runs the eco-conscious tie-dye Etsy shop Adroit in California, notes that dyeing out in the yard with family and friends is a nice way to bond, whereas solo dyeing feels more meditative.
Choose the right tie-dye kit for your family
For a birthday party on a budget, the Jacquard Tie Dye Kit is the cheapest per shirt at $20 on Amazon ($24 at Walmart) for 15 T-shirts if you can handle a two-day project, while the Tulip One-Step Tie-Dye Kit ($20 on Amazon for about 9 shirts, with 18-bottle party packs available) is best when you need everything done in one day. If you just want the lowest upfront price on 100% cotton, the Tulip Two-Minute Tie Dye Kit runs $10. Your choice comes down to whether you want prefilled bottles that wrap up before bedtime, maximum shirts per dollar, a two-minute microwave shortcut, or bulk liquid dye for repeat projects. Prices below come from product testing and retail listings and may vary.
Tulip One-Step Tie-Dye Kit
Tulip One-Step runs $20 on Amazon or $37 at Walmart and delivered the brightest, boldest results with the least mess and effort in testing. The squeeze bottles come prefilled with powdered dye, so you just add warm water and shake. Each kit includes 2 pairs of gloves and 20 rubber bands. Because you only use about a third of a bottle per shirt, 3 bottles cover roughly 9 T-shirts (about $2.20 per shirt at $20), and 18-bottle party packs exist if you’re hosting a crowd. The dye sets in 6 to 8 hours, so you can finish the whole project in one day.
Jacquard Tie Dye Kit
Jacquard is listed at $20 on Amazon and $24 at Walmart (and also listed at $19 on Amazon and $16 at Walmart). It requires a 20-minute presoak in soda ash (a fixative powder that helps dye bond to cotton) plus at least 12 hours of setting, stretching the project past 24 hours across two days. It makes 15 T-shirts (around $1.33 per shirt at $20) and includes soda-ash fixer, 1 pair of gloves, 40 rubber bands, and a bonus premix bottle. In Mohrman’s testing, a rainbow spiral with red, yellow, and blue blended smoothly with saturated color and zero bleeding in the first wash.
Tulip Two-Minute Tie Dye Kit
At $10, this is the fastest budget option if you’re working with 100% cotton only. It sets in 2 minutes using microwave heat and comes with 4 squeeze bottles (yellow, fuchsia, turquoise, and green), 10 rubber bands, 2 pairs of gloves, and 2 microwave trays.
Rit Tie-Dye Accessory Kit
The accessory kit costs $19 on Amazon or $16 at Walmart, with dyes sold separately. You measure 2 teaspoons of dye per squeeze bottle, so 8-ounce dye bottles make 24 squeeze bottles for dozens of projects. Its microwave method (applying dye and fixative, setting 30 minutes, microwaving 5 minutes, and cooling about 10 minutes) works only on fabrics under 35% synthetic fiber. Skip Rit’s alternative 3-hour sun method: in Mohrman’s testing, it bled dye in the wash and turned a white towel pink. Rit ColorStay Dye Fixative is available as an add-on if you want extra bleed protection.
If you want other options, the BEYOU Tie-Dye Kit requires using mixed dye within 24 hours, setting fabric for 6 to 8+ hours wrapped in plastic, and skipping fabric softener or dryer sheets on prewashed shirts because they block the dye. For softer shades instead of bright rainbow, look at the Tulip Pretty Pastels Tie-Dye Kit.
Make your own dye: food coloring vs. fiber-reactive
A tie-dye kit is better for family projects that need bright, permanent color; homemade food-coloring dye is better when kid safety and a near-zero budget matter more than durability. Making your own dye lets you use pantry staples or stretch a single color across a big batch, but homemade doesn’t automatically equal kit dye in how well it holds up in the wash.
Food-coloring dye
Mix 8 drops of food coloring per half cup of lukewarm water, adjusting by 2 drops up or down depending on how bold you want it. It’s safe to wear, stains well, and stores easily in squirt bottles or empty clean shampoo bottles. It needs an overnight set in a sealed plastic bag and several salt-water rinses, and over time it fades more like a craft project than permanent kit dye.
Fiber-reactive dye bath
Textile artist Shabd Simon-Alexander, author of Tie-Dye: Dye It, Wear It, Share It, uses Jacquard Procion or Dylon Permanent fiber-reactive dye (a dye that chemically bonds to natural fibers) plus soda ash for lasting single-color designs. You’ll need a 3-gallon bucket (enamel, stainless steel, or plastic), a glass jar with a lid, rubber gloves, and a measuring spoon.
Dissolve 2 to 4 teaspoons of dye powder in a half-jar of cool water, shake to dissolve, and pour it into 1 gallon of cool water in the bucket. Dissolve 6 teaspoons of soda ash in a half-jar of hot water and add that too. Soak the shirt for 30 to 60 minutes, stirring frequently, or dip sections for each color.
Soda ash: the presoak that makes dye stick
Soda ash (sodium carbonate) is a fixative presoak that helps dye bond to fabric fibers so colors absorb evenly and stay bright. Mix it with warm water until the shirt is evenly damp; it often comes packed inside kits or is sold separately at craft stores.
Soak times depend on your dye chemistry, so don’t average them: plan on 20 minutes for Jacquard, 30 minutes for the food-coloring method, and 30 to 60 minutes in a fiber-reactive dye bath. None of the tested family or kit protocols here use vinegar to fix dye, relying on soda ash instead.
Tie the pattern: swirl, stripes, and rubber band specs
Tight binding and pleats, not the dye itself, create the crisp white space and pattern that make tie-dye look intentional. Before you uncap a bottle, scrunch, twirl, fold, or twist your damp fabric and secure it with rubber bands.
Classic swirl and pattern variations
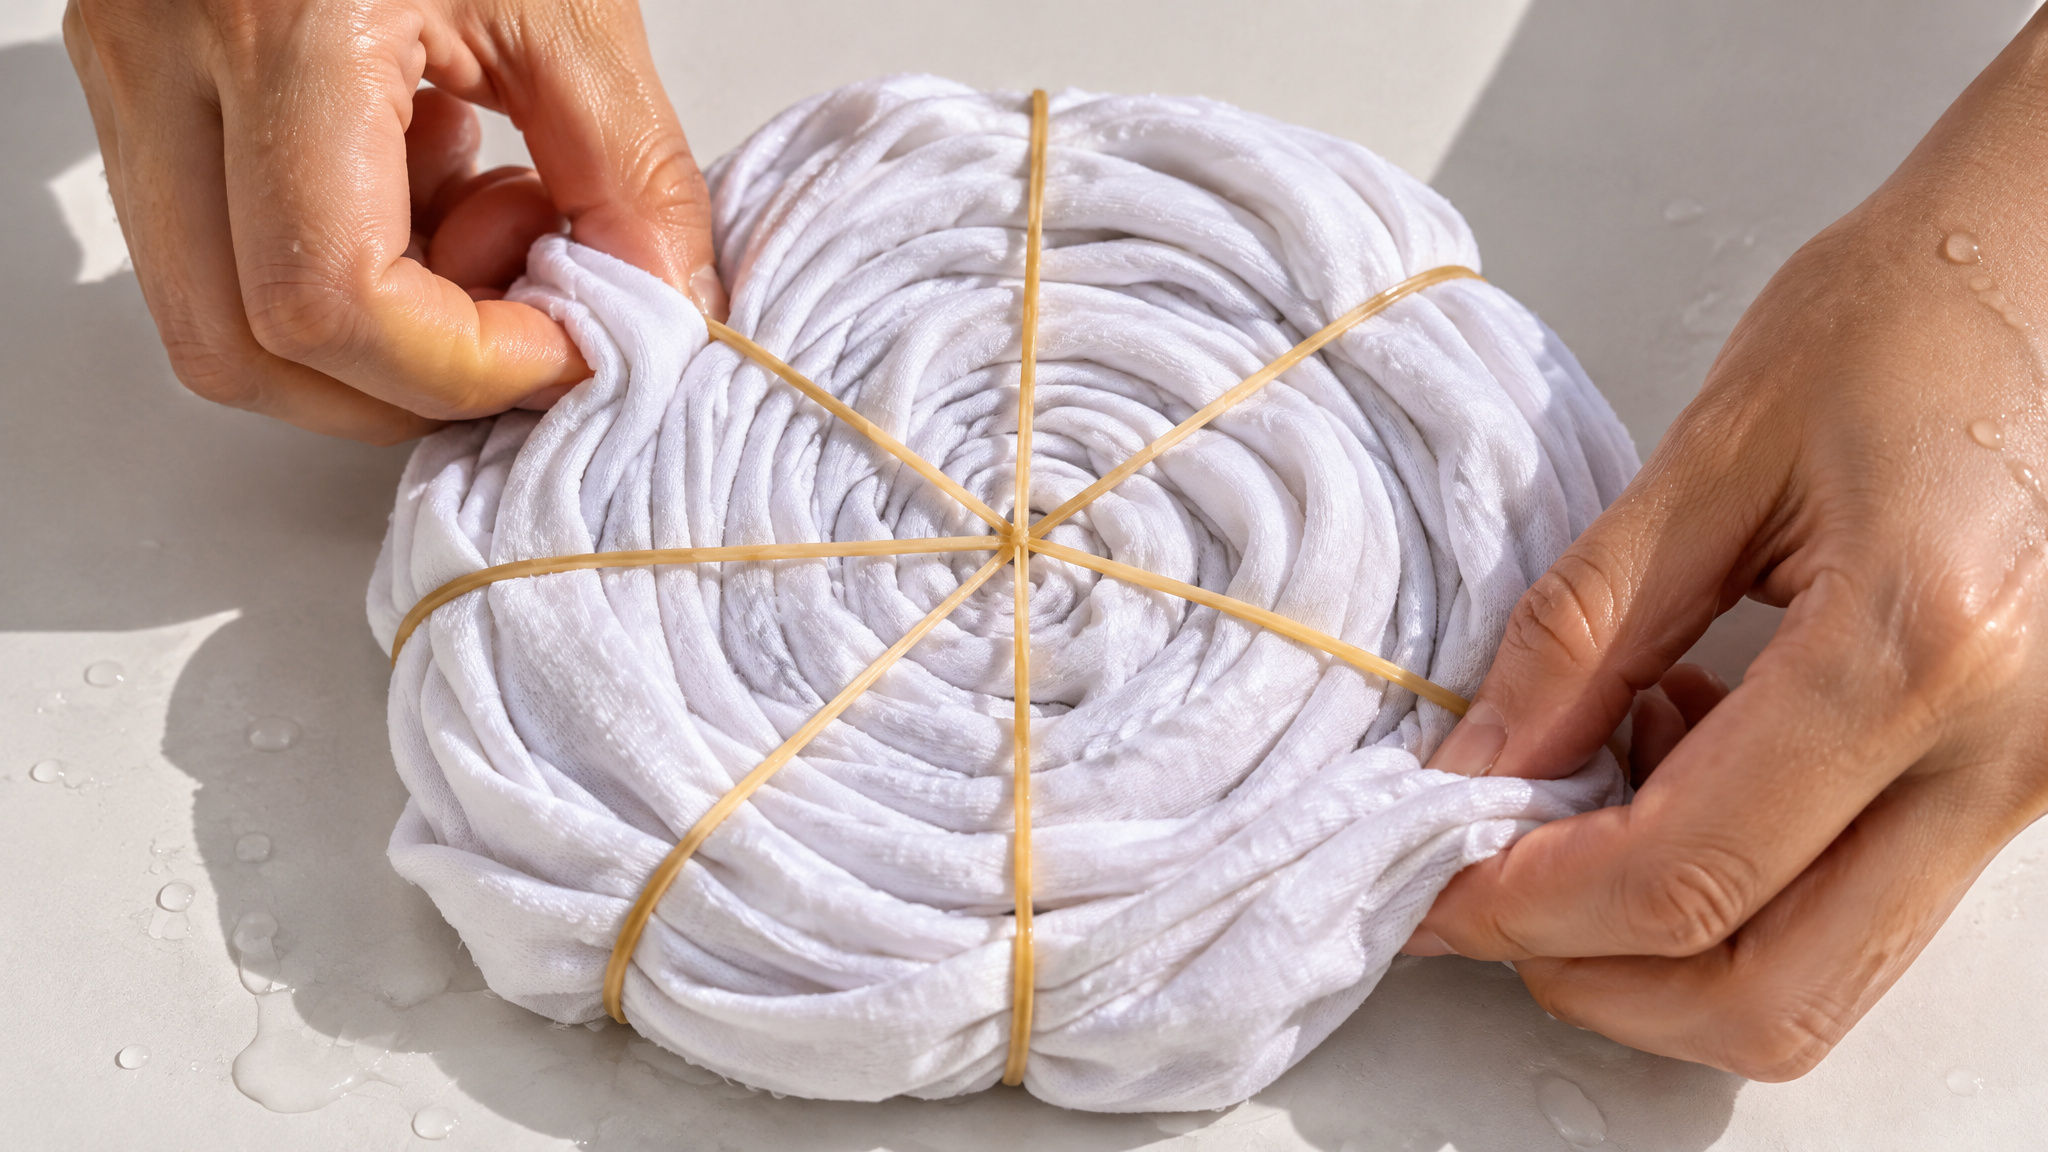
For the go-to classic swirl:
- Lay your damp shirt flat and pinch the center.
- Twist clockwise until the fabric spirals into a flat disk.
- Wrap 3 to 4 rubber bands around the disk so they cross in the middle like pie slices.
If you want variety, bunch sections or roll a shirt lengthwise with bands every few inches for stripes, or tie small knots secured with bands for circles. Garment shape helps guide the design too: try sleeve rings on long-sleeve shirts, or focus color around the collar on tanks and tees.
Rubber bands and pleats
Bands around 1.5 inches work best. Skip anything over 2.5 inches long, wider than 1/4 inch, or too stretchy, because loose bands let folds slip out of place.
Alicia Vitarelli, reporting at 6abc.com in April 2020 on Philadelphia business owner Jackie Pepper Green of Dye It Pepper, described Green’s method: start with a damp item, make tight pleats that leave white space inside, bind tightly with rubber bands, and apply dye to both sides. For a fun variation, try glue-resist hearts: draw heart outlines with glue as a barrier, paint dye inside with a brush, let it set 6 to 8 hours, then wash the glue away. Where dye sneaks under the glue, it leaves a “perfectly imperfect” look.
Apply the dye without turning it muddy
Muddy tie-dye is almost always the result of using too many colors and drenching the fabric. Kavula recommends that beginners start with 4 or 5 simple pieces and patterns (mixed dye stays usable for a couple of days, so you can always do more later), stick to 3- or 4-color palettes, and work with just 1 or 2 colors at a time.
Apply lighter colors like pink, yellow, and lime green first. Darker colors can layer over light, never the other way around. Squeeze enough dye to soak through the folds without flooding the fabric, and leave a little intentional white space so colors stay crisp; careful overlap of red, yellow, and blue will still give you a clean rainbow.
Before you squirt, shake each dye bottle for 10 to 15 seconds with the cap snapped tight and a finger over the tip, because undissolved powder leaves dots and streaks. Simon-Alexander also suggests adding a little salt when mixing kit dye to boost color.
How long tie dye needs to sit (by method)
Tie-dye set time depends on the dye chemistry: Tulip One-Step needs 6 to 8 hours, Jacquard needs at least 12 hours, the Two-Minute Kit takes 2 minutes, and food-coloring dye sits overnight in a sealed bag.
| Method | Presoak | Set Time | Notes |
|---|---|---|---|
| Tulip One-Step | None | 6 to 8 hours | Wrap in plastic wrap or zip-top bag |
| Jacquard | 20 minutes (soda ash) | 12+ hours (24+ hours total) | Two-day project |
| Generic kit guidance | Varies by kit | 12 to 24 hours | Keep bands on and wrapped |
| Tulip Two-Minute Kit | None | 2 minutes | 100% cotton only; microwave trays |
| Rit microwave method | None | 30 min + 5 min microwave + ~10 min cooling | Under 35% synthetic fiber |
| Food-coloring method | 30 minutes (soda ash) | Overnight | Sealed plastic bag |
| Jackie Pepper Green’s method | Damp item | ~8 hours | Color both sides before setting |
Leave the rubber bands on and wrap each piece in plastic wrap or a zip-top bag while it sets. If you pull the bands off early, you’ll get softer, pastel-like colors rather than full saturation. Of 7 sources read for this guide, 4 say 6 to 8 hours, 1 says overnight, 1 says 12 to 24 hours, and 1 says at least 24 hours, so matching your wait time to the specific dye on your table matters more than guessing.
Rinse and survive the first wash
To wash a tie-dye shirt for the first time without colors bleeding, rinse it in cold water until the runoff runs clear, then wash it alone with no more than 2 tablespoons of detergent and a light test rag. Put your gloves back on for the rinse so you don’t re-stain your hands, and if you used food-coloring dye, rinse several times in salt water until clear.
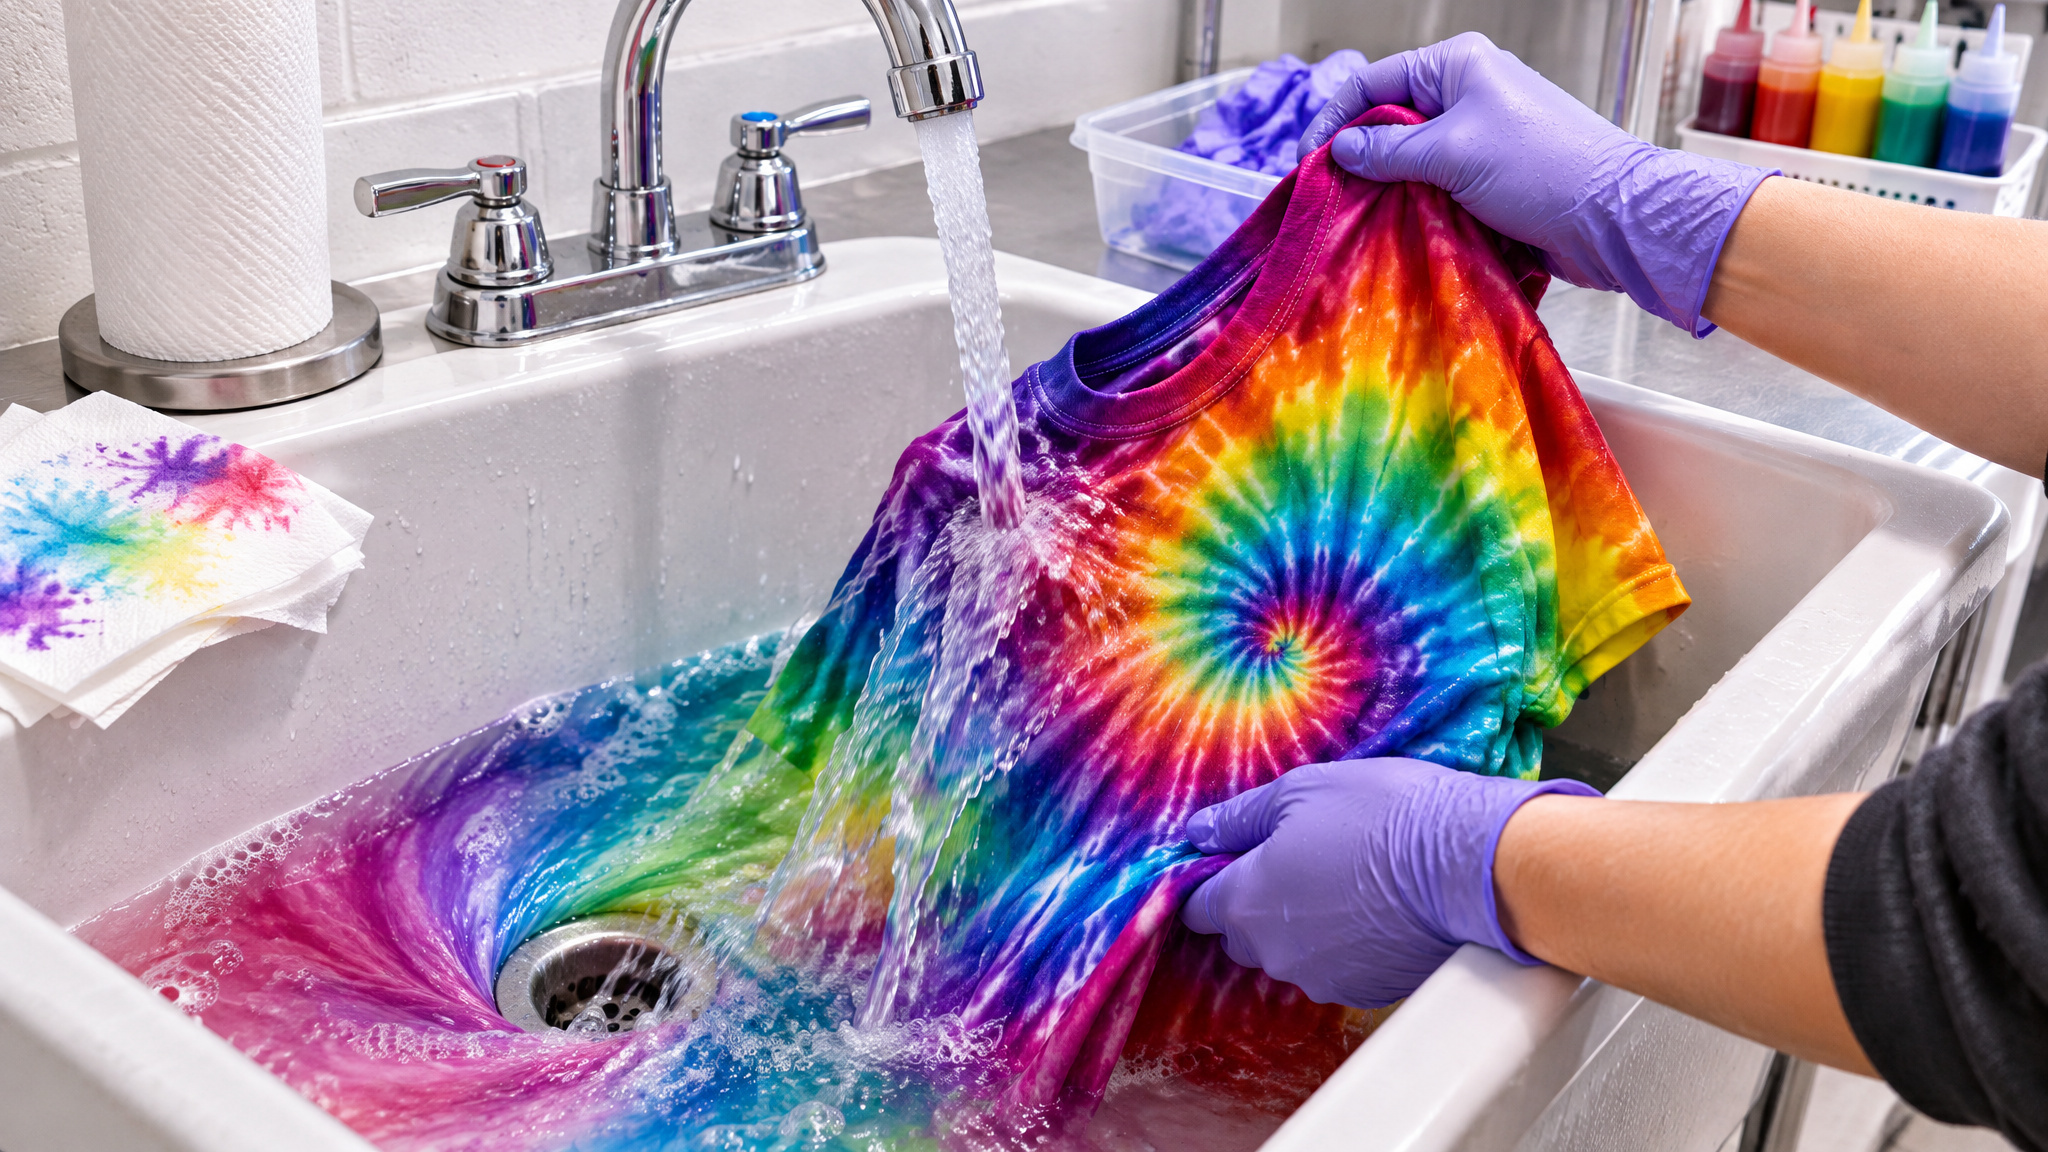
Wash the dyed piece alone on its first cycle, tossing in a light-colored rag so you can spot any dye transfer before you trust it with regular laundry. Kit instructions call for a cold-water wash, whereas Green’s protocol washes the item alone on a hot cycle. Skipping that thorough rinse has real laundry consequences: in Mohrman’s testing, Rit’s sun method bled dye in the wash and turned a white towel pink. Rit ColorStay Dye Fixative is an optional extra step if you want added protection.
All 4 sources read for this guide that answer whether to rinse freshly dyed fabric in cold or hot water say cold. Among 3 posters reporting their own experience when asked how they rinsed shirts after dyeing, 1 says cold water first, then hotter (to clear out the soda ash before finishing hot), 1 says hot water in the washer, and 1 says no rinse before washing, showing real-world habits vary even when guides agree on cold.
Mistakes, stained shirts, and projects beyond the tee
Tie-dye is forgiving enough for kids of almost any age, and craft guides set no minimum age rule: pair younger kids with kid-safe food-coloring dye, and save powder-dye kits with gloves for older kids who can handle squeeze bottles safely. Simon-Alexander notes it’s virtually impossible to tie-dye incorrectly and some of her best designs came from happy accidents, which Green echoes.
That forgiving nature makes stained clothes fair game. Green’s Port Richmond, Philadelphia business, Dye It Pepper, started when she rescued her daughter’s water-ice-stained shirt and strangers asked where she bought it; the shop now sells tie-dyed bedding, bags, and adult wear, runs live Instagram tutorials, and donates a portion of DIY kit proceeds to No Kid Hungry. My daughter and I took that same spirit beyond T-shirts when we dyed her tie-dye bikini together, keeping swimwear’s synthetic-fiber limit in mind so the color actually stuck.
Frequently Asked Questions
How to mix dye for tie dying?
It depends on the type of dye you’re working with. For prefilled squeeze-bottle kits like Tulip One-Step, just add warm water and shake vigorously for 10 to 15 seconds with a finger over the tip so undissolved powder doesn’t leave dots or streaks; for Rit’s squeeze-bottle method, measure 2 teaspoons of dye per bottle. If you’re making homemade food-coloring dye, stir 8 drops into half a cup of lukewarm water (give or take 2 drops for boldness), while a fiber-reactive dye bath takes 2 to 4 teaspoons of dye powder dissolved in cool water and poured into a gallon of cool water alongside 6 teaspoons of dissolved soda ash.
What age is tie-dye appropriate for?
There’s no strict minimum age, because tie-dye is forgiving enough for almost anyone who can hold a bottle. For toddlers and very young kids, pair them with kid-safe food-coloring dye so you don’t have to worry about harsh powders. Save the powder-dye kits and disposable gloves for older kids who have the hand coordination to aim squeeze bottles safely.
What does vinegar do when dyeing fabric?
In standard family tie-dye kits and fiber-reactive protocols, vinegar isn’t used as a fixative at all. Instead, those methods rely on soda ash (sodium carbonate) as a presoak to help the dye chemically bond to cotton and natural fibers. That chemical bond is what keeps colors bright, evenly absorbed, and resistant to washing out.
How do you tie-dye a shirt step by step with kids?
Start by prewashing and dampening 100% cotton shirts, covering your workspace, and getting everyone into gloves and old clothes. Twist, pleat, or scrunch the damp fabric and secure it tightly with 1.5-inch rubber bands before applying 3 or 4 colors—lighter shades first—without flooding the folds. Wrap the finished shirts in plastic wrap or zip-top bags to set for the kit’s required time, then rinse them in cold water until clear and wash each piece alone with a light test rag.
Is a tie-dye kit or homemade food-coloring dye better for family projects?
A commercial tie-dye kit wins whenever you want bold, permanent colors that survive the laundry. Homemade food-coloring dye is great when kid safety and spending almost nothing matter most, since it uses pantry staples and washes up easily. The trade-off is longevity: food coloring needs an overnight set plus several salt-water rinses and will fade over time like a craft project rather than lasting like kit dye.
What is the best tie-dye kit for a large group of kids?
Tulip One-Step is the top pick for a crowd when you want to finish the whole project in a single day. Three prefilled bottles cover roughly 9 T-shirts, 18-bottle party packs are available for bigger groups, and the dye sets in just 6 to 8 hours with minimal mess. If you have two days to spare and want to stretch your budget further, Jacquard yields 15 shirts per kit, though it requires a 20-minute soda ash presoak and at least 12 hours to set.
Tulip One-Step vs. Jacquard tie-dye kit: which sets faster and lasts longer?
Tulip One-Step is much faster, setting in 6 to 8 hours with no presoak so you can finish everything before bedtime. Jacquard takes over 24 hours across two days because it requires a 20-minute soda ash presoak plus at least 12 hours of setting time. In exchange for the wait, Jacquard delivers intense, saturated color with zero bleeding in the first wash.
How do you keep tie-dye mess under control when dyeing with children indoors?
Cover every inch of your table with plastic sheeting, garbage bags, or a disposable tablecloth before opening a single bottle, because uncovered surfaces can stain permanently. Put kids in well-fitting disposable gloves, tie back long hair, keep paper towels within arm’s reach, and use a plastic bin to hold or rinse wet fabric so it never touches bare furniture. In our house, we also split setup, tying, dyeing, and cleanup across the whole family so one person isn’t stuck scrubbing alone.
How long does tie-dye need to sit before rinsing?
Wait times depend entirely on the dye chemistry you’re using, so check your specific method rather than guessing. Tulip Two-Minute Kit sets in 2 minutes in the microwave, Tulip One-Step needs 6 to 8 hours, food-coloring dye sits overnight in a sealed bag, and Jacquard needs at least 12 hours (over 24 hours total with its presoak). Keep the rubber bands on and wrap each piece in plastic wrap or a zip-top bag the whole time—pulling bands early leaves you with softer, pastel-like colors instead of full saturation.
Why did my tie-dye come out muddy and how do I fix it?
Muddy colors almost always happen from mixing too many shades together and drenching the fabric until the dyes bleed into each other. You can’t undo a shirt that’s already set, but on your next batch, stick to 3 or 4 colors, work with 1 or 2 shades at a time, and always apply lighter colors like yellow or pink before darker ones. Leaving a little intentional white space and stopping before the fabric floods will keep your pattern crisp.