
When I told my friends I’d be done remodeling my kitchen in a month, two at most, they went quiet. Not the dramatic-movie silence. The polite kind. The kind where everyone sips their drink and nobody says what they’re all thinking. Turns out they were right and I was wrong: a full DIY kitchen remodel takes at least three months before you can cook a single pot of pasta, plus another one to two months of punch list items afterward, which is about the timeline professionals handle on Colorado Springs kitchen remodels without breaking a sweat.
Here’s the honest trade, stated up front: doing your own remodel devours your free time and strains your friendships, and your health takes a real hit too. It also saves tens of thousands of dollars and ends with a decent kitchen, one without the teal-and-salmon laminate countertops I dated for way too long. You can remodel your kitchen yourself. You shouldn’t walk into it thinking “a month, maybe two.”
So this is the article I needed before I started: eight things I wish somebody had told me, what I’d do differently next time, and the full 12-step order of work with real costs at every stage.
Key Takeaways
Plan on at least three months before your kitchen is cookable, plus one to two months of punch list, and set up a temporary kitchen with an induction cooktop before demo day.
Most kitchen remodels average about $27,000 (typical range $15,000, $41,000), with cabinets and labor eating the biggest share; set aside another 10% for what demolition reveals.
A full DIY remodel costs you free time, social life, and some health, and saves tens of thousands of dollars. Both columns are true.
Table of Contents
How long a DIY kitchen remodel really takes
Plan on at least three months before your kitchen is usable for real cooking, plus another one to two months of punch list work after that. That’s not a scare number, it’s what this project actually took. I guessed one to two months. My estimate was fiction, and the friends who heard it and said nothing knew that before I did.
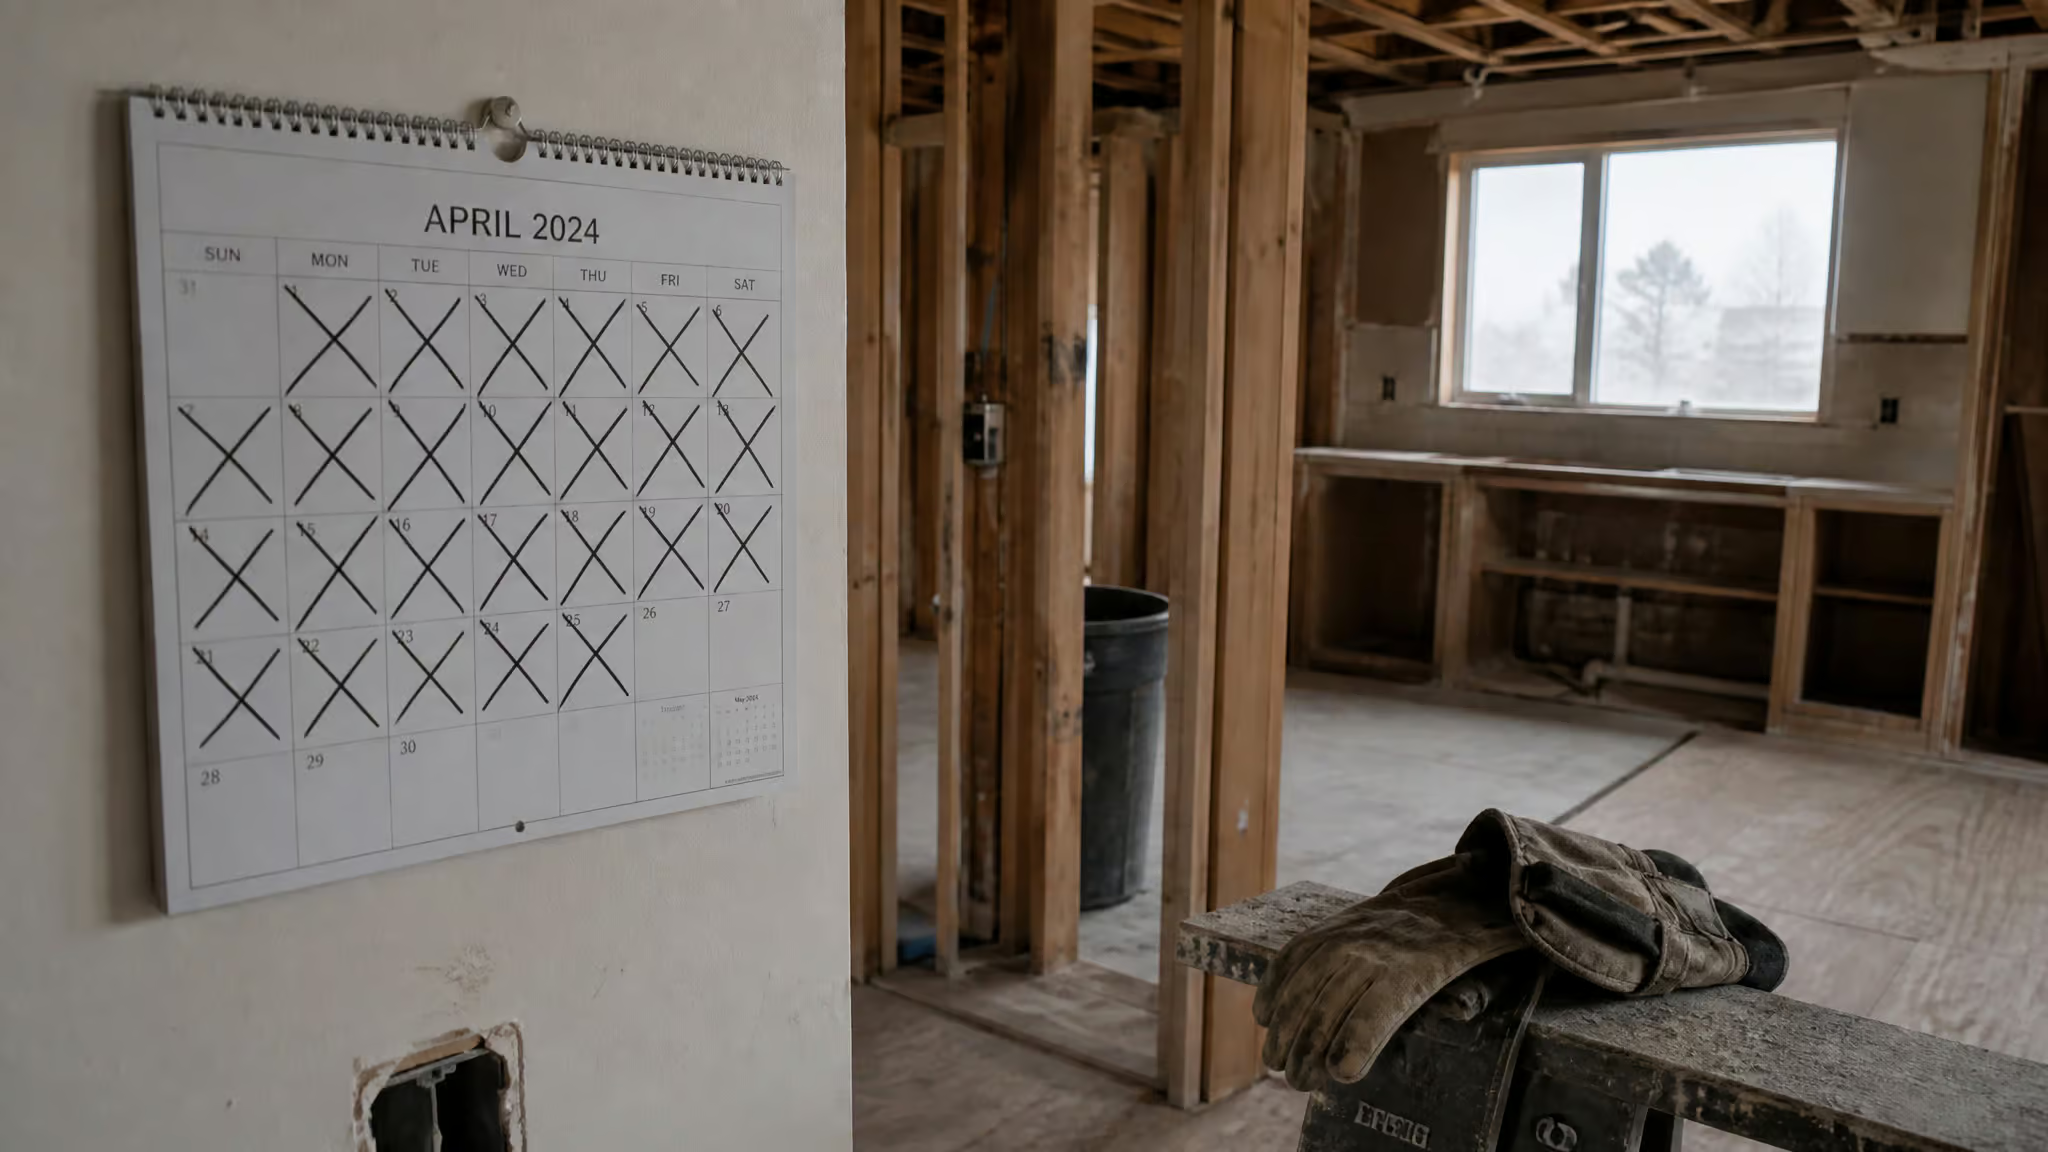
A quick note on scope: three-plus months is what this remodel looked like, in an older house, largely done around real life. Your project could move faster how long should a bathroom remodel take often averages just 3 to 6 weeks. But nobody should budget their optimism for a timeline. Budget the reality, and anything quicker feels like a win.
The part that wore me down most wasn’t the construction. It was the three months of frozen food, because I never built a real temporary kitchen. Microwaving things in the garage is the default setup people limp through, and three months of frozen food is sad and not great for you.
The temporary kitchen setup I’d build next time
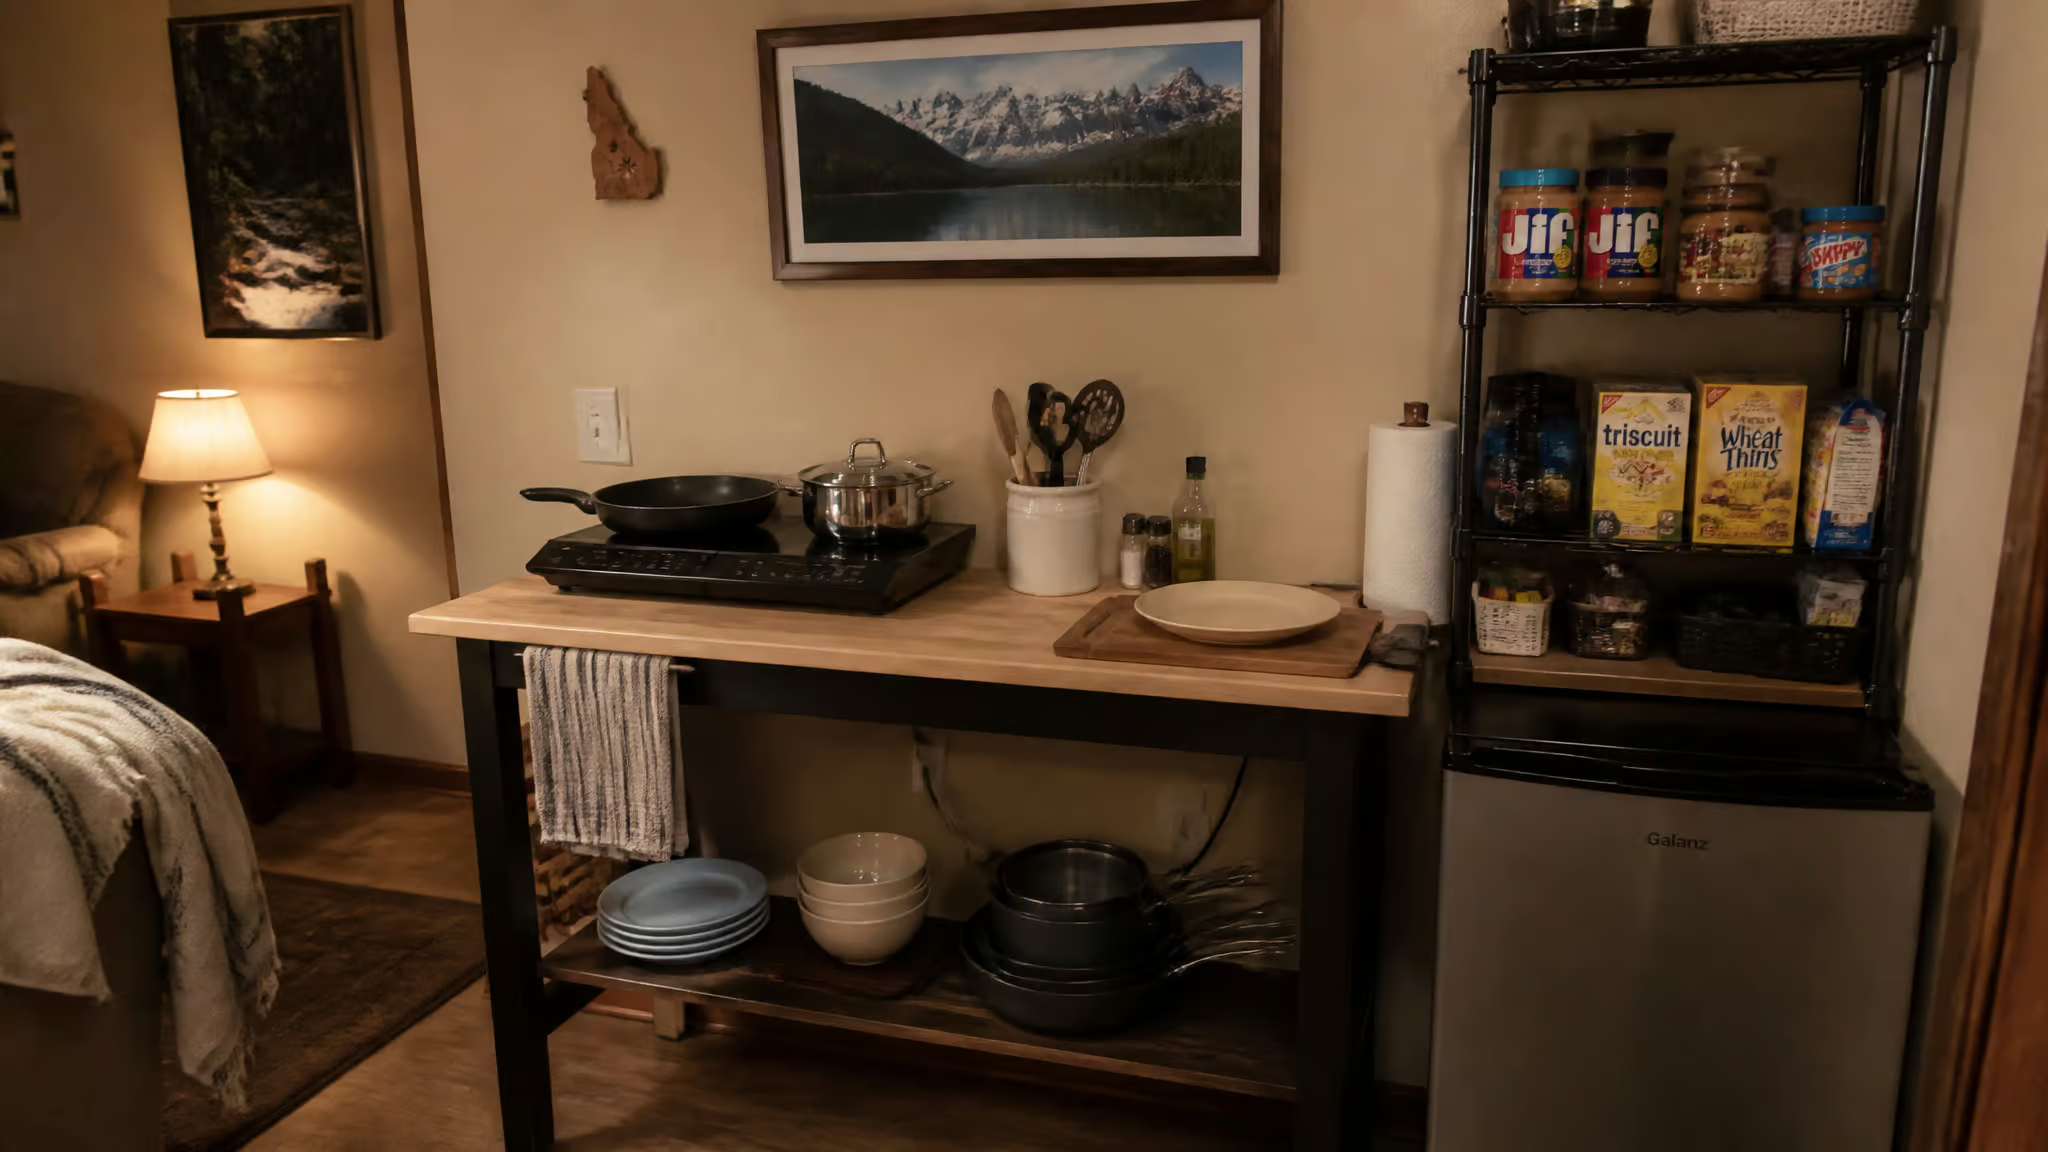
If I did it over, the induction cooktop is the centerpiece, full stop. It plugs in, it actually cooks, and it turns a corner of another room into a kitchen instead of a sad snack station. Then two more upgrades:
- Real kitchenware. Actual plates and pans instead of paper plates and plastic forks. I thought disposable would be easier. It aged worse in every way.
- A restaurant meal or two budgeted every week. Tracey Amadio, a kitchen designer, makes the same point: budget more for eating out during the remodel. It’s the forgotten line item, and it’s kindness to future you.
Layer that over the standard survival setup: pick another room in the house, stock only the essential appliances, add a mini-fridge for perishables, and fill a shelf with nonperishables like peanut butter, crackers, and snack bars. Do this before demo day, not during. You will not have the energy to do it after.
In what order should you remodel a kitchen?
The order is: brainstorm, budget, hire contractors, demo, utilities, walls, flooring, cabinets, countertops and sink, appliances, backsplash, then lighting and your punch list. That sequence matters because each stage either exposes or protects the one below it. Here’s the whole thing with real numbers, so you can skim it in the stolen minutes you actually have.
Brainstorm and sketch it out
This is the fun step. Let it be fun. Pick a style direction (mid-century modern vs. farmhouse is the classic fork), save ideas from Pinterest and home improvement sites into a vision board, and let that board be what keeps your later spending pointed at what you actually wanted.
Then ask the friend-question: how does your kitchen actually get used? Andrew Saladino of Kitchen Cabinet Kings makes the point that functional improvements, meaning better lighting, more storage, and reliable appliances, matter more than flashy stuff, and that accurate measurements are non-negotiable.
Finally, sketch a rough layout, galley or open, island or no island, and roughly where the cabinets go. A rough layout is what gets you real ballpark estimates from contractors later.
Create your budget
This is the un-fun conversation with yourself that saves pain later. The anchor numbers: about $27,000 is the average kitchen remodel per Home Advisor, with a typical range of $15,000, $41,000. Yours will differ based on kitchen size, materials and appliances, how much a contractor handles, and whether walls come down. There’s no wrong answer in that spread.
Where does the money actually go? Cabinets and labor eat most of it. The two relief valves: revamp your existing cabinets with paint or hardware, and DIY whatever you safely can.
And take Tracey Amadio’s rule: set aside 10% of your overall budget for what demolition and installation reveal. That’s the “oh no” fund, and every remodel needs one. (I won’t pretend to cover formal budgeting frameworks here; the 10% contingency is the rule this piece can actually back.)
Interview and hire contractors
Even a DIY remodel uses pros somewhere, so treat hiring like interviewing, because you’re choosing someone who’ll be in your house for months. Word of mouth comes first: friends, colleagues, your own research. Big-box stores and showrooms are great for materials ideas and referrals, and showroom browsing is free.
Get at least three estimates, and make sure each one includes a timeline. When it gets done matters as much as what it costs.
Understand the payment rhythm before you sign: 10% upfront, 25% at each of three stages, and the final 15% on completion. That last chunk isn’t pettiness. Holding money back until the work is finished is what protects you. Ask every question you have before signing.
Demo day
Demolition is loud, messy, and weirdly satisfying. Average cost runs about $800 for a full kitchen demo, and partial demo or leaving the plumbing where it is costs less. If you’re doing a partial tear-out, here’s what each piece runs:
| Item | Cost |
|---|---|
| Laminate or carpet removal | $1, $5 per sq ft |
| Tile removal | $2, $4 per sq ft |
| Countertop removal | $50, $300 |
| Fixture removal | $50, $300 per unit |
| Appliance removal | $60, $600 |
| Cabinet removal | $300, $500 |
| Wall demolition | $1,000, $10,000 |
DIY-ing some of the demo trims labor costs. And the boring-but-crucial advice: plan cleanup and disposal before demo day, not after. Know where the debris goes.
One more thing: demo is where your house starts confessing. The subfloor and insulation surprises later in this article both showed up the moment the walls came down.
Connect utilities: plumbing and electrical
Here’s where I stop joking. Plumbing and electrical updates should be overseen by a licensed professional contractor. This is a boundary, not a suggestion. Permits are required, the work needs to be done right, and a done-wrong job puts your entire family in harm’s way. Permits exist to protect your household, not to annoy you.
Red flag: If a quote skips permits for plumbing or electrical, walk. This stage is pros-only, no matter how handy you are.
So you can sanity-check quotes, here’s roughly what this stage runs. Electrical: about $450 in materials, $10, $500 in permits, and $50, $150 per hour in labor. Plumbing: about $3,500 in materials, $50, $500 in permits, and $75, $150 per hour in labor.
You can still save here by keeping your old plumbing and electrical if it’s safe. Safe is the hinge word. If it’s safe, keep it. If there’s any doubt, it goes to the pros.
Rebuild the walls
Walls going back up is the moment the space starts looking like rooms again. If utilities were updated or the layout changed, insulation and drywall go in, then everything gets primed and painted.
Quick cost context: drywall runs $0.50, $0.75 per sq ft in materials, $0.50, $1.50 in finishes, and $1.50, $3 in labor; insulation runs $1, $4 in materials and $0.25, $0.50 in labor. Hanging drywall in a small, rectangular area is DIY-friendly if you pick sheet sizes that minimize cuts. Complex installs go to a pro, because small mistakes stand out and fixing them eats the savings.
One dated-but-fun trend note from Tracey Amadio: green was the most popular cabinet color in 2024, with warmer tones replacing cooler ones. Take that for what it’s worth and no more.
Replace the flooring
This is the step where the room becomes real. Ceramic tile is a popular pick, but here’s the full spread:
| Flooring | Cost per sq ft |
|---|---|
| Linoleum | $1.50, $20 |
| Wood tile | $1.50, $21.50 |
| Laminate | $1.70, $17 |
| Ceramic tile | $3, $30 |
| Wood | $4, $29 |
Don’t apologize for linoleum and laminate. They’re the classic budget picks and they come in stylish looks now, and linoleum especially is straightforward to install yourself. Some flooring manufacturers even run DIY workshops, which is free help worth taking.
Honest warning, though: flooring can be one of the most involved parts of a DIY remodel. Set your time expectation now so you’re not blindsided mid-project.
Update the cabinets
Cabinets are usually the biggest line item, and most kitchens run about 30 linear feet of them. Your paths, without any snobbery: stock cabinets are sold as-is and are cheapest, semi-custom adds specialized elements with a longer wait, and custom is built to your spec at the top price.
| Cabinet type | Cost per linear ft |
|---|---|
| Stock | $50, $100 |
| Semi-custom | $75, $400 |
| Custom | $470, $1,230 |
| Installation labor | $50, $300 |
Two more paths: reface when the surfaces have problems paint won’t fix (fresh veneer on the frames, doors, and drawer fronts). Heads up that DIY refacing equipment runs around $2,000, which is exactly why hiring a pro often makes more sense. Refinish when the boxes are dingy but structurally sound: paint or stain, with DIY equipment running roughly $100, $500. That’s the cheapest path when the bones are good.
Saladino backs the budget routes too: stock, thermofoil, laminate, and flat-pack cabinets you assemble yourself are all cost-effective. And a sneaky-smart aside: stock cabinets can be used to build a DIY kitchen island.
Add the new sink and countertops
The surfaces everyone touches. The install, in plain steps: put backing like plywood on the cabinets, test-fit the countertop, cut the sink hole from the template with double-checked measurements (remember this one; it’s about to matter), then attach everything according to the countertop type.
What the materials cost:
| Countertop | Cost per sq ft |
|---|---|
| Laminate | $10, $40 |
| Butcher block | $20, $70 |
| Ceramic | $1, $100 |
| Granite | $40, $100 |
| Wood | $20, $140 |
| Concrete | $50, $150 |
| Engineered quartz | $50, $200 |
| Stainless steel | $70, $215 |
Granite on a budget is a hunt: look at overlays, remnants at stone yards or a Habitat for Humanity ReStore, and wholesalers. The hunt is part of the fun.
For sinks: drop-in sinks are the easiest to install yourself, because the edges cover uneven cuts. No shame to anyone committed to under-mount, but the drop-in is forgiving.
Install the appliances
Appliances go in last, but choose them first, the whole kitchen is built around them. And check their specs hard, because manufacturer specs can be off or misleading, and then things don’t fit. Double-check, and if you can, get them delivered before the cabinets are built.
| Appliance | Cost range |
|---|---|
| Microwave | $100, $600 |
| Cooktop | $400, $1,300 |
| Oven/stove | $600, $1,300 |
| Refrigerator | $600, $2,300 |
Shop independent businesses and home improvement stores both. And one real price fact with zero aesthetic judgment attached: white appliances typically cost less than black or stainless.
Backsplash and design touches
This is where kitchens stop looking like everyone else’s. A backsplash adds flair while protecting the walls from grease and moisture, so it’s pretty and practical in the same breath.
| Backsplash | Cost per sq ft |
|---|---|
| Beadboard | $0.80, $3.50 |
| Ceramic tile | $1, $100 |
| Vinyl tile | $2, $10 |
| Glass tile | $10, $40 |
| Stone slab | $25, $300 |
Beadboard is the easy win: budget-friendly, trendy, and nearly effortless to install. Interlocking ceramic panels work too, some with adhesive backing. Or grab reclaimed wood off local classifieds for a shiplap look. Secondhand sourcing is on brand here.
Lighting and final finishes
The layer that makes the photos. There are two kinds to know: ambient lighting for the whole room (chandeliers, track, recessed over the island or table) and task lighting where you actually work, like under-cabinet LED strips.
| Fixture | Materials | Labor |
|---|---|---|
| Under-cabinet | $20, $50 | $200 |
| Recessed | $30, $230 | $200, $250 |
| Chandelier | $120, $1,400 | $200, $2,000 |
See how the labor column stacks up? The cheap DIY win: LED puck lights run about $25 each with adhesive backing, or an 8-foot LED strip is around $20 with more consistent coverage. Small numbers, real difference.
Replace the subfloor before you build on it
Should you repair or replace the kitchen subfloor before installing cabinets? It comes down to your house’s age: if it’s newer, you can often get away with patching, leveling compound, or a few nails. If it’s older, the kitchen subfloor underneath is probably in poor shape, and you should budget for full-sheet replacement instead of burning hours on repairs that fail. When we replaced ours, full sheets of 23/32-inch tongue-and-groove plywood gave a smooth, solid base for mounting the base cabinets.
The subfloor is the plywood layer under your floor that everything else sits on, and it’s the bedrock of the whole room. Your flooring, appliances, tables, and especially your base cabinets are only as solid as what’s underneath them. When I replaced ours, full sheets of 23/32-inch tongue-and-groove plywood gave a smooth, solid base for mounting the base cabinets. That spec sounds fussy; it means one thick, interlocking sheet instead of patchwork.
I burned whole evenings patching faulty subfloor before admitting that replacement was the answer. I fought it way too long, and here’s the thing: the repair-vs-replace decision often gets made twice, because patching fails first and then you do it properly. If you’re in that stubborn phase right now, consider this your permission slip to quit a losing repair.
Expect insulation to be in bad shape behind the walls
Yes, when you’re gutting an older kitchen, expect hidden problems, and missing or moldy insulation is one of the most common. Budget for the possibility of a full subfloor replacement too, and it helps to know the full scope of kitchen remodeling costs before you commit. I’ll cover the subfloor next.
Here was my surprise: zero insulation behind the drywall. Nothing. Which explained why the kitchen felt like ice every winter and why our energy bills were sky-high. This isn’t unusual in older homes, and it’s worth knowing before you open the walls so you’re not shocked when you find it.
The likely gross spots: behind the sink, around the stove, and under windows. And “moldy insulation” just means insulation that’s absorbed moisture and grown mold; it’s a heads-up, not a panic, and it’s a normal thing to find and replace.
The payoff is real, though. I put in rock-wool insulation, which keeps the kitchen warm in winter and delivers stellar soundproofing. Nobody warns you about the quiet. It’s a quality-of-life upgrade you’ll notice every single day.
Experts get it wrong sometimes, verify their measurements
Verify fixture dimensions before anyone templates or orders cut-to-fit materials, and yes, it’s acceptable to politely ask a pro to do it. You’re paying for it, and they expect it.

The story: a countertop estimator showed up with an $815 laser level, a tripod, tape measures, and years of experience. Impressive array of gear, especially for an $815 laser level. He never once looked at the sink. I asked him to check it, the dimensions didn’t match his assumption, and he said, “I think you just saved my job.”
I’m not telling this to dunk on contractors. One instance, one estimator, one bad assumption. But the transferable tell is simple: when nobody unboxes the fixture before templating, that’s your cue to speak up, the same way you’d want a clear bathroom remodel timeline before anyone starts demo. Ask warmly, matter-of-factly, and without apology. You’re not being difficult. You’re doing quality control on your own kitchen.
Packaging is endless during a remodel
Designate a packaging staging room before the shipments start arriving, and cut down every box the day it arrives. That’s the whole tip, and it saved my remaining sanity.

Nobody told me about the packaging. It’s mountains of cardboard, foam, and plastic, and the range is absurd, big appliances down to a bag of cabinet hardware. And it keeps coming: every shipment of cabinets, sink, plumbing materials, and electrical supplies brings more. The absurd range is the funny part, right up until your hallway disappears.
The fix is two lines. Claim a spare bedroom or hallway as the packaging zone. Then cut every box up immediately, because flat cardboard is a fraction of the bulk. That’s it. That’s the habit.
The electrical system isn’t set in stone, build in flexibility
Build slack into your permitted electrical work up front using three tactics: service loops, adjustable boxes, and a couple of spare outlets. Then your plan can survive post-approval changes without deviating from it.
Here’s the permit reality, minus the dread: the electrical permit application has to itemize everything, and inspectors expect you to stick to the plan. That paperwork pins you down. But plenty changes after approval anyway, because you’re standing in a gutted room and suddenly the outlet that made sense on paper doesn’t make sense in real life.
So ask your electrician for these three things before the work starts:
- Service loops, extra slack in the cable so a box can move a few inches without rewiring.
- Adjustable boxes instead of boxes nailed to studs, for the same reason.
- A couple of extra outlets, just in case.
Honest cost of flexibility: some of our already-run cable and boxes had to come out. It was worth it anyway. And build the wiggle room in before the permit is final. Never deviate from a permitted plan after the fact.
RTA cabinets: the savings are real, and so is the assembly time
Ready-to-assemble (RTA) cabinets are worth it if you can give them about a week of assembly. You get furniture-grade 1/2-inch plywood boxes and solid wood doors and drawer fronts at a fraction of the price, because the labor you’re saving is your own. That’s the whole trade: money saved, evenings spent. Show both sides of the receipt, because the time is the real price.
To be clear about the week: that’s what assembling all our base and wall cabinets took, squeezed around real life, with a learning curve on the first few. It’s my experience, not an industry standard. The first cabinet takes forever. They get faster.
Stock, semi-custom, custom, reface, or refinish?
Quick decision guide. Reface when your cabinets have surface problems paint won’t cover: new veneer on the frames, doors, and drawer fronts, with DIY equipment around $2,000, which is exactly why a pro often makes more sense at that point. Refinish when the boxes are dingy but structurally fine: paint or stain, roughly $100, $500 in equipment.
For context on the buy-new routes: stock runs $50, $100 per linear foot, semi-custom $75, $400, custom $470, $1,230, and installation labor $50, $300. And a fun aside from earlier that bears repeating: stock cabinets can build a DIY kitchen island.
If you only do one thing
Paint the cabinets. It’s the single easiest big-impact change in a kitchen. Refacing, meaning new doors and drawer fronts, is the close second and is sometimes cheaper. Everything else can wait.
Kitchen drywall is easier than you fear, judge it by what stays visible
Before you dread drywall, map which wall sections stay exposed after the remodel, because perfect work is only required there.
I braced for the full misery tour: hanging sheets, mudding, sanding, dust fine as talc settling on everything I owned, results that didn’t look right no matter what I did. I expected all of it. Here’s what actually happened: base cabinets, wall cabinets, big appliances, backsplash, and the exhaust hood cover the rest, so only about a quarter of kitchen drywall stays visible.
Once I understood that, the whole job reframed. Small sections of wall actually needed to look good. Everything else just needed to be behind things. All that stress was over nothing, and if you’re currently stressing about your drywall, I’d like to formally introduce you to my past self, who stressed for nothing too.
What a kitchen remodel really costs, and what DIY saves
A DIY kitchen remodel saves tens of thousands of dollars, with the average full remodel running about $27,000, but every one of those savings carries a time price. Filter each one through what your free time is actually worth.
The budget anatomy, one more time because it’s the spine: about $27,000 average per Home Advisor, typical range $15,000, $41,000, with cabinets and labor dominating, plus your 10% contingency. That buffer exists precisely because demo reveals things, like subfloor that needs full replacement, insulation that’s missing or moldy, and wiring that has to come out.
Where the savings actually live, each priced in time:
- Refinish or reface your cabinets instead of replacing: paint or stain costs $100, $500 in DIY equipment; refacing often makes more sense with a pro.
- Laminate or butcher-block counters: $10, $40 and $20, $70 per sq ft respectively, both DIY-able.
- Linoleum flooring: $1.50, $20 per sq ft and DIY-friendly.
- LED strip lighting: about $20 for an 8-foot strip.
- Beadboard backsplash: $0.80, $3.50 per sq ft, nearly effortless.
- RTA cabinets and DIY labor generally: the big two, and they carry the documented time costs, about a week of cabinet assembly and months of your own labor.
Match the finish level to the house
Worth thinking about resale while you design, not because you’re flipping, but because choosing carefully now prevents regret later. The comfort half first: a good kitchen matters for top dollar, and money put into the kitchen generally comes back at sale.
The calibration half: a $40,000 kitchen in a $120,000 house makes no sense. Neither does shortchanging a $3,200,000 house. Match the finish level to the house, match the kitchen to the house’s style (if you’ve got a Spanish Style Tudor, let it be one), and keep it cohesive with your bathrooms. One house, one story.
And the tile-is-forever truth: wild tile risks resale, because tile is forever. Get your pop from towels, art, and accessories, the swappable layers. Express yourself where it’s reversible.
Design decisions before you buy anything
Before a single cabinet gets ordered or a single hammer swings, the design decisions come first. This is the stage that keeps the rest of the 12-step order of work pointed at a kitchen you actually want, instead of one assembled from showroom impulses. Start with why you’re doing this, then work down to materials and finishes.
Start with your WHY
Before you buy anything or swing a hammer: why are you redoing this kitchen? More space? New everything? Seating?
Better lighting? Whatever’s true for you, write it down. The list is short on purpose.
Its whole job is to referee later, when a wild tile pattern or an expensive appliance starts whispering your name. Everyone gets seduced by tile. The why-list is how you walk out of the showroom with your original plan intact.
List every decision before you start
Write down everything you’ll have to decide: flooring, cabinets, countertops, backsplash, cabinet hardware, fixtures, sinks, appliances, lighting, wall and ceiling paint colors. I know it sounds overwhelming. Writing it down actually lowers the overwhelm, because vague dread is worse than a known list.
If you think you might change the floor plan, that decision goes first. Everything else follows it.
Timeless materials
Subway tile is the easy forever answer. Marble, or its quartz lookalikes, is the beautiful, unpredictable one. Together they make a safe, timeless kitchen. The specific combo to steal: white quartz countertops with a marble 3×6-inch tile backsplash.
Marble is the worst material that seems like a good idea
I want to tell you this as a friend who lived it. Marble stains and etches. Honed marble countertops in a working kitchen means living with every lemon slice and tomato-splash as a permanent guest. It looks like a good idea. It is, in my hard-earned opinion, the worst material that seems like a good idea.
There’s a rescue arc, to be fair: I eventually found a UV coating that made my marble about as durable as quartz. Relief was real. But if I were choosing again, I’d pick porcelain or quartz, which look similar without the babysitting. Same look, less anxiety.
Two mistakes to avoid, and some small wins
First, the all-white kitchen. No judgment if you love white, but pure white-everything can fall flat. Add texture with butcher block or reclaimed-wood shelves, and color by painting the island. You’re adding depth, not correcting taste.
Second, island pendants. If the pendant isn’t bigger than your head, it’s too small. Small pendants make the whole island feel busy and cluttered. This is the rule you’ll repeat to other people.
Rapid-fire small wins:
- Spend real time at your local tile shop. Touching the tile in person beats scrolling, always.
- Go with handles on drawers and cabinet doors, knobs aren’t required anywhere, and it’s one less decision to agonize over.
- Save inspiration photos, note what exactly draws you to each one, and show them to your contractor or cabinet designer. Pictures say the thing words fumble.
- Layer your lighting: can lights, pendants over the island, and under-cabinet lighting so your countertops and backsplash are actually lit. People remember appliances and forget light.
One caveat that can’t be undone: moving plumbing
Before you relocate any plumbing, confirm your foundation type and test the change against your why-list. Most dramatic-looking kitchens never require moving it at all.
Here’s the one-way door, stated simply: once you move plumbing, that’s where it stays. There’s no elegant undo. On a slab foundation (concrete poured right on the ground, common in Southern California), moving plumbing means cutting into that slab, which makes it a big deal. On a raised foundation, where there’s a crawlspace under the house, it’s easier.
Field note: Before any plumbing moves, hold it up against your why-list. If the answer is no, reflow the kitchen you already have.
So before any plumbing moves, hold it up against the list you made. Does moving the faucet actually serve what you wanted from this kitchen? If the answer is no, take heart: kitchens can be reflowed without moving a single pipe. The layout you want is probably available within the plumbing you have.
The finish line
So, the full ledger, both columns, no apology. Yes, doing your own remodel costs you your free time, your social life, and a chunk of your health. And yes, it saves tens of thousands of dollars and produces a kitchen worth having. That’s the trade, and I’d make it again.
The mechanics of the end, so you know what “done” looks like: every term in your contract gets fulfilled before the final payment goes out. That’s not distrust; that’s how the deal works. Then the punch list gets done, item by honest item, and then, finally, the temporary kitchen comes down.
I think about that moment more than any before photo. The induction cooktop goes back in its box. The mini-fridge returns to the garage. And for the first time in three months, you boil a pot of pasta in your own kitchen, at your own stove, under lights you picked and above floors you laid.
It’s the moment the whole thing was for. Go get yours.
Frequently Asked Questions
Is it hard to remodel a kitchen by yourself?
It’s genuinely hard: a full DIY remodel takes at least three months before you can cook, plus one to two months of punch list work afterward, and it costs you free time, social life, and some health. But it’s absolutely doable, and it saves tens of thousands of dollars. The critical boundary is plumbing and electrical — those should always be overseen by a licensed professional with permits.
What is the 30% rule in remodeling?
The budgeting rule backed by kitchen remodelers is a 10% contingency: set aside 10% of your overall budget for what demolition and installation reveal, because opening walls almost always surfaces surprises. The bigger anchor numbers are that the average kitchen remodel runs about $27,000, with a typical range of $15,000 to $41,000, and cabinets plus labor eat the largest share.
Should you replace the kitchen subfloor or just repair it before installing cabinets?
If your house is newer, patching, leveling compound, or a few nails often works. If it’s older, budget for full-sheet replacement — full sheets of 23/32-inch tongue-and-groove plywood give a smooth, solid base for mounting base cabinets. Repair-vs-replace often gets decided twice because patching fails first; if you’re burning hours on repairs that keep failing, quit the losing repair and replace.
What hidden problems should I expect when gutting an old kitchen?
The most common surprises are subfloor that needs full replacement, missing or moldy insulation behind the drywall, and wiring that has to come out. Missing insulation is especially common in older homes — and replacing it with rock-wool adds warmth plus surprisingly good soundproofing. This is exactly why you set aside a 10% contingency: demo is where your house starts confessing.
How do I plan the electrical layout and permit for a kitchen remodel?
The electrical permit application has to itemize everything, and inspectors expect you to stick to that plan — so build flexibility in before the permit is final, never deviate afterward. Ask your electrician for three things up front: service loops (extra cable slack so a box can move a few inches), adjustable boxes instead of boxes nailed to studs, and a couple of spare outlets. Budget roughly $450 in materials, $10–$500 in permits, and $50–$150 per hour in labor.
How do I set up a temporary kitchen during a remodel so I can still cook?
Set it up before demo day, not during, because you won’t have the energy afterward. The centerpiece is a plug-in induction cooktop, which actually cooks instead of just reheating. Add a mini-fridge for perishables, a shelf of nonperishables like peanut butter and crackers, real plates and pans instead of disposables, and budget a restaurant meal or two per week — it’s the forgotten line item and a kindness to future you.